728x90
MaterialApp
플러터 프로젝트를 생성하면 기본으로 생성되는 main.dart 의 MyApp 클래스 입니다.
class MyApp extends StatelessWidget {
  // This widget is the root of your application.
  @override
  Widget build(BuildContext context) {
    return MaterialApp(
      title: 'Flutter Demo',
      theme: ThemeData(
        // This is the theme of your application.
        //
        // Try running your application with "flutter run". You'll see the
        // application has a blue toolbar. Then, without quitting the app, try
        // changing the primarySwatch below to Colors.green and then invoke
        // "hot reload" (press "r" in the console where you ran "flutter run",
        // or simply save your changes to "hot reload" in a Flutter IDE).
        // Notice that the counter didn't reset back to zero; the application
        // is not restarted.
        primarySwatch: Colors.blue,
      ),
      home: MyHomePage(title: 'Flutter Demo Home Page'),
    );
  }
}
MaterialApp 제일 마지막 부분에 home 속성은 앱이 실행되었을 때 화면에 가장먼저 보여지게 될 라우트입니다. 아래는 MyHomePage 이죠.
home: MyHomePage(title: 'Flutter Demo Home Page'),class MyHomePage extends StatefulWidget {
MyHomePage({Key key, this.title}) : super(key: key);
....
MaterialApp 클래스를 살펴봅니다.
멀티 페이지 라우트 기능을 구현하기 위해서는 home 속성 대신에 routes 와 initialRoute 속성을 사용해야합니다.
  const MaterialApp({
    Key key,
    this.navigatorKey,
    this.home,
    this.routes = const <String, WidgetBuilder>{},
    this.initialRoute,
    ....
다음과 같이 Key: Value 방식으로 페이지를 관리합니다.
class MyApp extends StatelessWidget {
  @override
  Widget build(BuildContext context) {
    return MaterialApp(
      initialRoute: '/',
      routes: {
        '/' : (context) => MainPage(),
        '/page1' : (context) => Page1(),
        '/page2' : (context) => Page2()
      },
    );
  }
}
페이지 이동시에는 Navigator.pushNamed 를 사용하여 key 값으로 페이지를 찾아 이동하게 됩니다.
Navigator.pushNamed(
            context, '/page1'
);
구현
프로젝트를 생성하고, MyApp 을 제외한 나머지 클래스는 삭제했습니다.
import 'package:flutter/material.dart';

void main() => runApp(MyApp());

class MyApp extends StatelessWidget {
  // This widget is the root of your application.
  @override
  Widget build(BuildContext context) {
    return MaterialApp(
      title: 'Flutter Demo',
      theme: ThemeData(
        primarySwatch: Colors.blue,
      ),
      home: MyHomePage(title: 'Flutter Demo Home Page'),
    );
  }
}
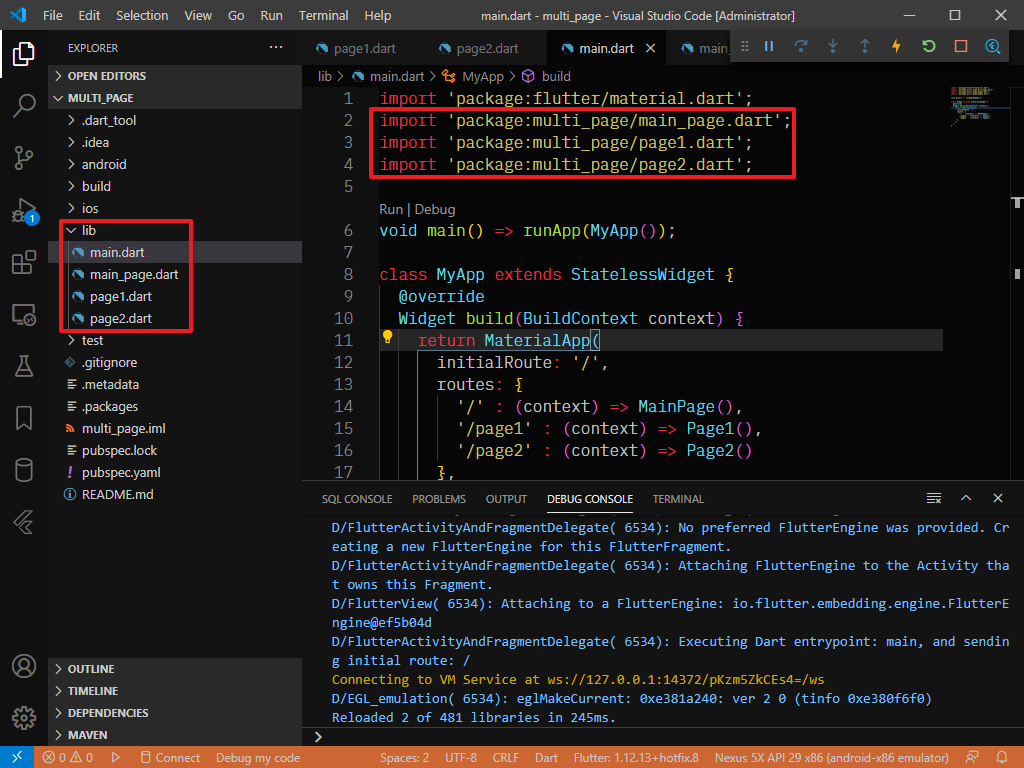
페이지별로 파일을 분리하여 import 하고 각 페이지에 대해서 Key: Value 형식으로 route 를 지정 합니다.
import 'package:flutter/material.dart';
import 'package:multi_page/main_page.dart';
import 'package:multi_page/page1.dart';
import 'package:multi_page/page2.dart';

void main() => runApp(MyApp());

class MyApp extends StatelessWidget {
  @override
  Widget build(BuildContext context) {
    return MaterialApp(
      initialRoute: '/',
      routes: {
        '/' : (context) => MainPage(),
        '/page1' : (context) => Page1(),
        '/page2' : (context) => Page2()
      },
    );
  }
}
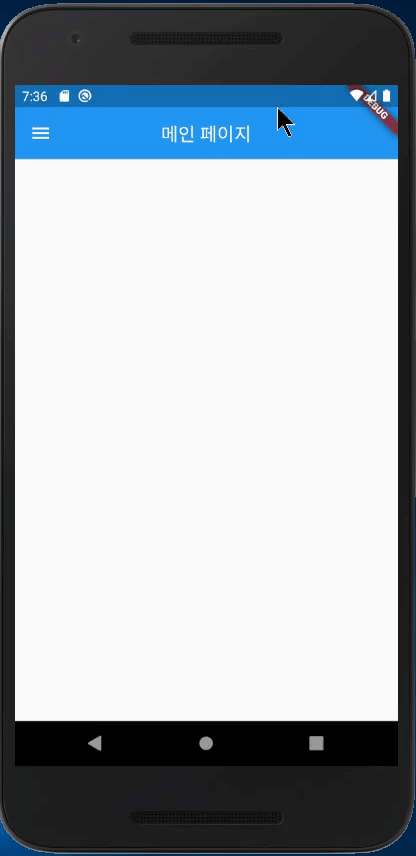
MainPage 는 Drawer 메뉴를 보여주며 각 페이지로 이동할 수 있습니다.
import 'package:flutter/material.dart';

class MainPage extends StatelessWidget {
  @override
  Widget build(BuildContext context) {
    return Scaffold(
      appBar: AppBar(
        title: Text('메인 페이지'),
        centerTitle: true,
        elevation: 0.0,
      ),
      drawer: Drawer(
        child: ListView(
          children: <Widget>[
            ListTile(
              leading: Icon(
                Icons.home,
                color: Colors.grey[850],
              ),
              title: Text('Page -1'),
              onTap: () {
                Navigator.pushNamed(
                  context, '/page1'
                );
              },
              trailing: Icon(Icons.arrow_forward,),
            ),
            ListTile(
              leading: Icon(
                Icons.home,
                color: Colors.grey[850],
              ),
              title: Text('Page -2'),
              onTap: () {
                Navigator.pushNamed(
                  context, '/page2'
                );
              },
              trailing: Icon(Icons.arrow_forward,),
            ),
          ],
        ),
      ),
    );
  }
}
1번 페이지
import 'package:flutter/material.dart';

class Page1 extends StatelessWidget {
  @override
  Widget build(BuildContext context) {
    return Scaffold(
      appBar: AppBar(
        title: Text('Page -1')
      ),
    );
  }
}
2번 페이지
import 'package:flutter/material.dart';

class Page2 extends StatelessWidget {
  @override
  Widget build(BuildContext context) {
    return Scaffold(
      appBar: AppBar(
        title: Text('Page -2')
      ),
    );
  }
}
결과입니다.
'Application > Flutter' 카테고리의 다른 글
| 플러터(Flutter) ListView 를 활용한 이미지뷰어 만들기 (0) | 2020.08.06 |
|---|---|
| 플러터(Flutter) ListView 사용하기 (0) | 2020.08.06 |
| 플러터(Flutter) 페이지 이동하기 : Navigator (0) | 2020.08.04 |
| 플러터(Flutter) 메뉴 만들기 -2 : ListView / ListTitle (0) | 2020.08.04 |
| 플러터(Flutter) 메뉴 만들기 -1 : AppBar / Drawer (0) | 2020.08.04 |